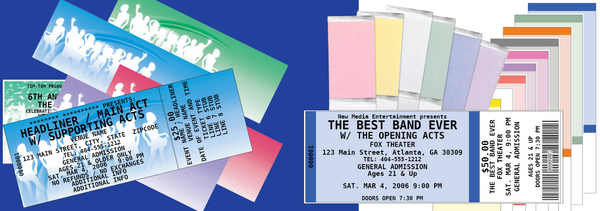
First, choose from one of our already made templates to customize.
The most important step is to make sure you have all of the necessary information about the event on the ticket.
- Event Title
- Artist Names
- Venue/Location
- Date & Time (including AM/PM)
- Description of type of ticket (General Admission, VIP, COMP, etc.)
- Ticket Prices
- Any additional information you may need on the ticket (i.e. “No Refunds/Exchanges, Rain or Shine Event”)
Once you have all of the information you need for the ticket, you can get as creative as you’d like when it comes to placement, size, and alignment of the text!
Use the ticket customization tool to select your text size, alignment, and which lines you want the text to go on. To write on the stub portion of the ticket, simply click on any of the lines and type directly into the text box. You can also use the space bar to create space between text in a single line, just as you would in a Microsoft Word document. Below is an example of one way you could format a ticket:

No matter how you decide to format your ticket, just be sure that all of the necessary information is available and clearly printed on the ticket.
As always, if you have any questions or need some extra help designing or ordering your ticket, call our friendly customer service reps at 877-725-4881, or by chatting with us online during our business hours.


